
The CDC has now given guidelines for the use of a cloth mask for protection from Covid-19. This is to help slow or prevent the spread of the virus. The CDC now recommends wearing cloth face coverings in public settings where it is difficult to maintain social distancing principles. This could be in a grocery store, doctor’s office or other place where you may be in close proximity with others.
The use of a simple cloth face covering can help slow the spread of the virus and may help people who actually have the virus from giving it to others.
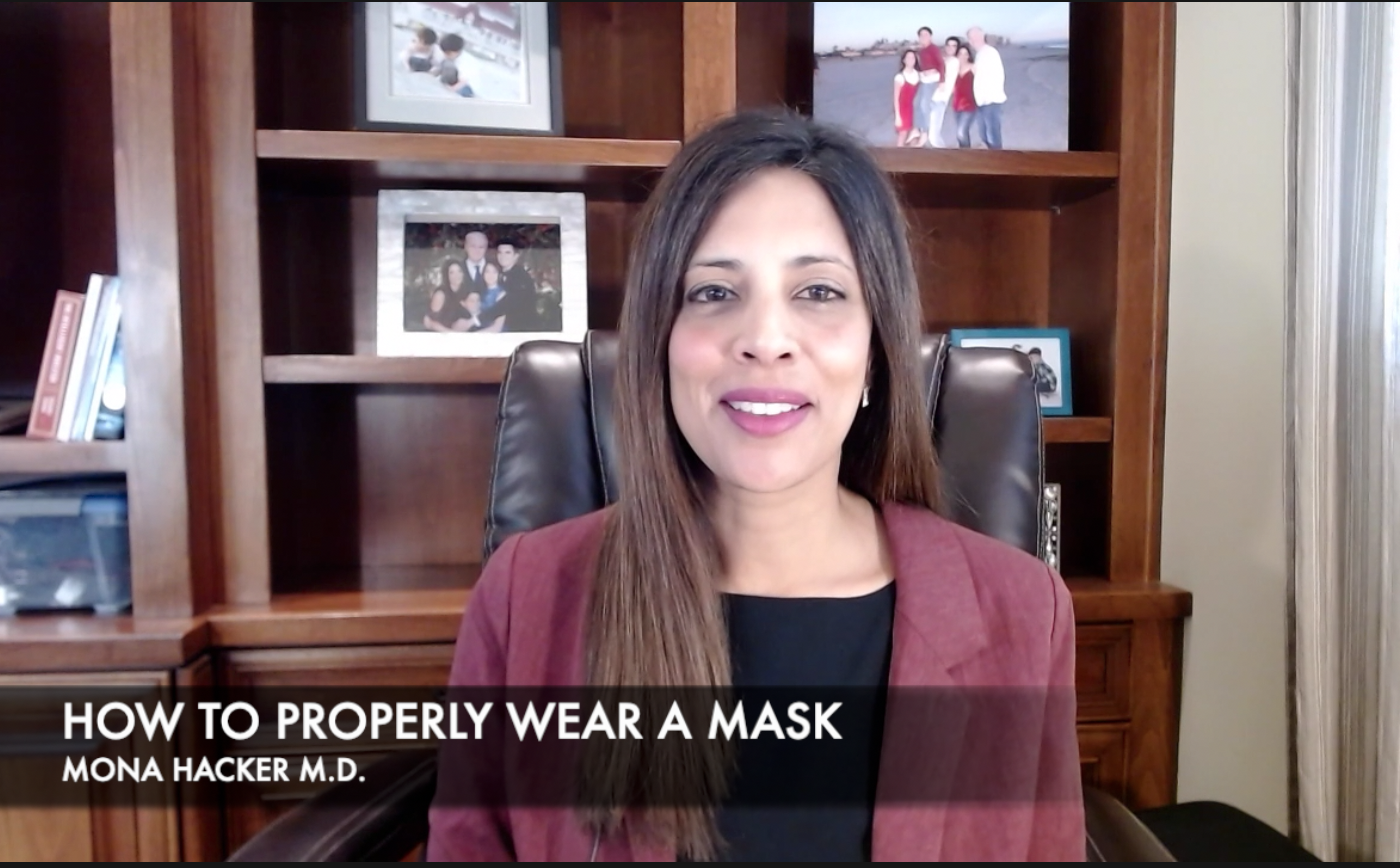
My cloth mask protects you, your cloth mask protects me.
These cloth masks can be bought, but may be hard to find. It’s easy to make a mask for yourself and your family using things you likely have at home. Don’t use masks on young children, anyone who has problems breathing, is incapacitated or not able to take off their own mask if needed.
Remember these cloth masks are not surgical masks or N-95 respirator masks. The porosity of them is much higher, blocking particles about 0.3 microns in size. I’ve included some information from the CDC about simple ways to make your own mask. Send me your ideas to share with others below.
From the CDC: (reference: https://www.cdc.gov/coronavirus/2019-ncov/prevent-getting-sick/diy-cloth-face-coverings.html)
Sew and No Sew Instructions
Sewn Cloth Face Covering
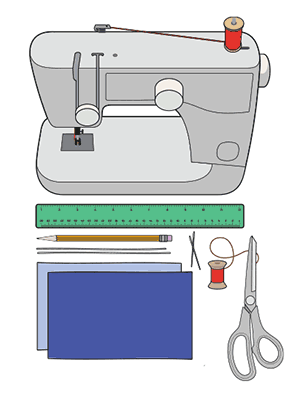
Materials
- Two 10”x6” rectangles of cotton fabric
- Two 6” pieces of elastic (or rubber bands, string, cloth strips, or hair ties)
- Needle and thread (or bobby pin)
- Scissors
- Sewing machine
Tutorial
1. Cut out two 10-by-6-inch rectangles of cotton fabric. Use tightly woven cotton, such as quilting fabric or cotton sheets. T-shirt fabric will work in a pinch. Stack the two rectangles; you will sew the mask as if it was a single piece of fabric.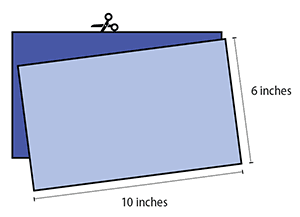
2. Fold over the long sides ¼ inch and hem. Then fold the double layer of fabric over ½ inch along the short sides and stitch down.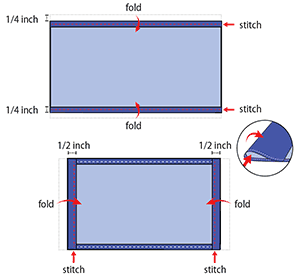
3. Run a 6-inch length of 1/8-inch wide elastic through the wider hem on each side of the mask. These will be the ear loops. Use a large needle or a bobby pin to thread it through. Tie the ends tight.
Don’t have elastic? Use hair ties or elastic head bands. If you only have string, you can make the ties longer and tie the mask behind your head.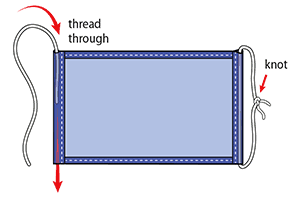
4. Gently pull on the elastic so that the knots are tucked inside the hem. Gather the sides of the mask on the elastic and adjust so the mask fits your face. Then securely stitch the elastic in place to keep it from slipping.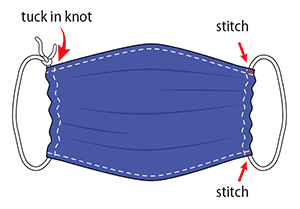
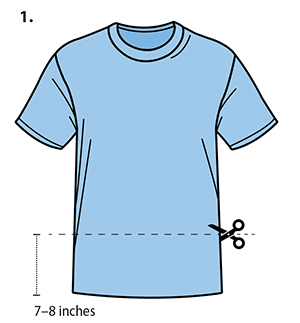
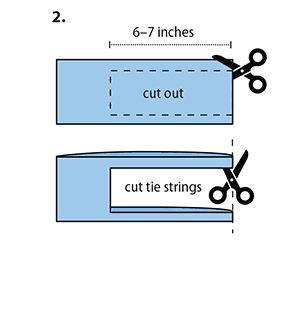
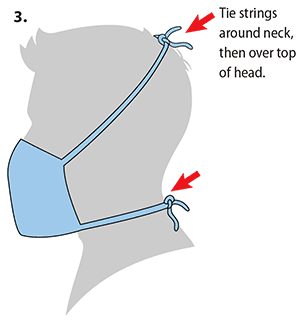
Quick Cut T-shirt Face Covering (no sew method)
Materials
- T-shirt
- Scissors
Tutorial
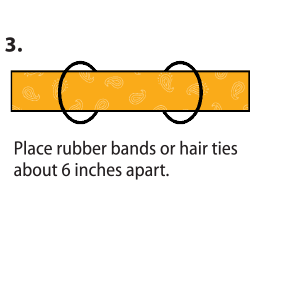
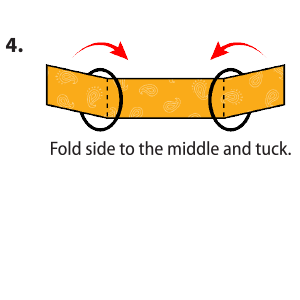
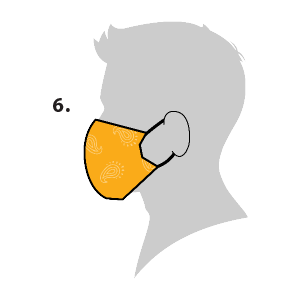
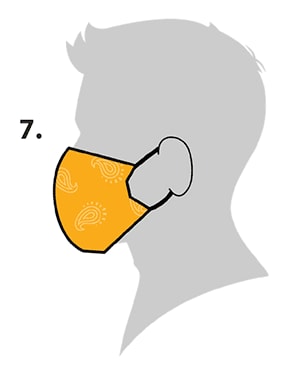
Bandanna Face Covering (no sew method)
Materials
- Bandana (or square cotton cloth approximately 20”x20”)
- Coffee filter
- Rubber bands (or hair ties)
- Scissors (if you are cutting your own cloth)
Tutorial


